Cinnamon Bun Smoothie

Cinnamon Bun Smoothie RecipeI make this Smoothie all the time! It’s a super easy morning treat for those of us that aren’t really big breakfast eaters or else don’t have much time in the mornings to prepare a grand feast! lol ~  The banana and almond milk make this smoothie have a very light & creamy texture that is just as delicious (and evil!) as that smoothie you love from the cafe – Just minus all those extra calories!  (So of course you love me now, right!?) lol 😉

Ingredients:

1 frozen banana, cut into pieces
1 cup unsweetened almond milk

1/2 teaspoon ground cinnamon
1/4 teaspoon vanilla extract
1/2 teaspoon pure maple syrup
Cinnamon stick, for garnish

Directions:

  1. Combine all ingredients in a blender. Blend until smooth, and add more almond milk if necessary.
  2. Pour into a tall glass, add the cinnamon stick for garnish and attractiveness 😉 & drink up!

Bon Appètit!

Makes one serving

https://i0.wp.com/media1.onsugar.com/files/2013/03/10/1/192/1922729/9fed84dee8a20c89_nutritional-info.xxxlarge.jpg

Baked Fall Apples

h..

Here’s a yummy little fall treat for you to try! Perfect by themselves as a breakfast dish, try serving these at your next brunch!  You can also serve with vanilla ice cream for dessert. 😉

Ingredients:

  • 6 baking Apples (such as Cortland, Empire, Gala, Braeburn, or Pippin)
  • 1 & 1/2 cup Oats
  • 1/2 tsp, Cinnamon
  • 1/2 tsp. Nutmeg
  • 1/2 cup chopped candied or plain Nuts (i used walnuts & almonds)
  • 1/3 cup light or dark brown Sugar
  • 1/2 cup dried Cranberry’s, cherry’s, or blueberry’s
  • 2 tablespoons Butter, cut into small pieces
  1. Heat oven to 400° F. Remove and discard the cores from the apples. Place the apples in a 9- by-13-inch baking dish.
  2. In a small bowl, combine the oats, spices, nuts, dried fruit, sugar and butter. Divide the mixture among the apples. (You can cover and refrigerate for up to 24 hours.) Bake covered until tender, about 25 minutes.

Tip from the test kitchen:  I’ve made these Apples using other settings as well and i really like how they turned out!*

*All I did was set my oven to 350° F  and then baked the apples, covered, for around 50 minuets instead. My thinking here is that it gives the apples more time to slowly release that juiciness and flavor into the mixture, and I’ve found that the apples i’ve made this way are extra soft and tender.

            ♥Leave me a comment below to let me know which way you decided to try these & how you liked it! ♥

Happy Baking & Bon Appètit!

Blueberry Buckle

Hey everybody!  Sorry for the crazy posting schedule this summer & i know this post is a little late! Life has been pretty insane so I’m afraid my blogging has suffered a bit! – During this time away though, I did have a chance to go blueberry picking, and once i got home i was super excited to try this recipe that my friend gave me! It turned out pretty amazing; so i hope you all like it as much as i do! 🙂

Ingredients:

  • 1Tsp. Vanilla
  • 3/4 cup Sugar (i mixed half brown sugar with the regular)
  • 1 Egg
  • 1/2 cup Butter (room temp.)
  • 2 cups Flour
  • 2 Tsp. Baking Powder
  • 1/4 tsp. Salt
  • 1/2 cup Milk (use part buttermilk or cream if you have it!)
  • 1/2 cup Sour Cream
  • 2 Cups Blueberry’s (you can also use strawberry’s , raspberry’s etc…)

Crumb Topping:

  • 1/3 cup Flour
  • 1/2 cup Brown Sugar
  • 1/2 stick melted Butter

Directions: Cream together the vanilla, sugar, egg, and butter in a big bowl until smooth. Add the dry ingredients, then finally pour in the sour cream and milk. Now before you go adding the berries in, your going to want to toss them with just enough flour to lightly coat them. This will help to prevent them from sinking to the bottom of the pan. Next pour into your pan, this is the part where you’ll add the topping crumb mix, and then slip it into a pre-heated oven. The  approx. bake time for this recipe is 45-60 minuets. So just keep an eye on the oven once it has been in for 45 mins, then poke a knife into the pan and see if it comes out clean – when i does, the blueberry buckle is ready for you to take out and enjoy!  🙂

Tip: the Crumb Topping recipe is just what i used this time, but you could defiantly change it up however if you have a better idea then mine! lol  – Please leave me a comment below if you do! 🙂

...Happy Baking & Bon Appètit!

Mango Pina Colada Smoothie

.jpg~Afternoon Everybody~  My mother and i decided to change things up a bit this morning & make a smoothie more on the tropical side of things! It is so fresh tasting and decadently delicious! I hope you all enjoy! 🙂
Ingredients:

  • 1 Mango, peeled, sliced & cubed
  • 1 1/4 cup Ice Cubes
  • 2 teaspoons Sugar (or agave nectar)
  • 1 1/4 cup Pineapple Juice
  • 1/2 cup heavy Cream
  • 1 (14 ounce) can Coconut Milk

Directions: Place the mango cubes, ice, sugar, pineapple juice, cream, and coconut milk into a blender. Puree until smooth, pour into glasses and serve.

White Chocolate Raspberry Scones

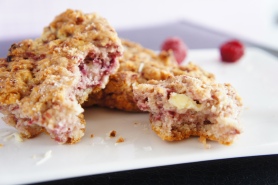
Raspberry White Chocolate Scones

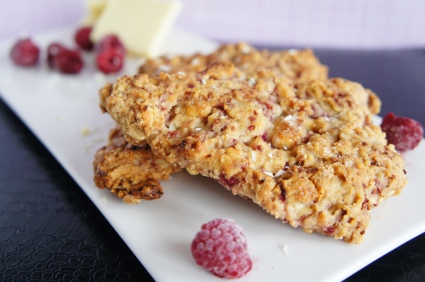
Serve these scones warm with a good cup of coffee (or tea!) for a delightful morning or early afternoon treat!  Bon Appètit!  :D

Ingredients:

Makes about 8 triangular pieces

  • 2 cups all-purpose Flour
  • 2 tablespoons white granulated Sugar, plus extra for sprinkling
  • 1 tablespoon Baking Powder
  • 1/2 teaspoon Salt
  • 6 tablespoons Butter, cut into small pieces
  • 3/4 cup Raspberries (fresh or frozen – I used frozen)
  • 1/2 cup White Chocolate chips
  • 1 large Egg
  • 1 teaspoon Vanilla extract
  • 1/3 cup Heavy Cream...

Directions:  Preheat oven to 350 degrees.
– In a large mixing bowl, whisk together flour, sugar, baking powder, and salt.
– Add in the butter and mix with your hands until mixture resembles coarse sand.
– Gently fold in raspberries and white chocolate chips. Set aside.

– In a small bowl, beat together egg, vanilla, and heavy cream.
– Pour over the scone batter and lightly mix until the dough comes together. The dough will be sticky.

– Turn out dough on a lightly floured surface, form a circle, and flatten it until it is about 1-inch thick.
– Using a sharp knife dipped in flour, cut 8 equal pie wedges (the dough will be slightly unmanageable, but not adding additional flour results in tender scones).
– Transfer scones to a baking sheet using a flat spatula dipped in flour and sprinkle the tops of the scones with a little granulated sugar.
– Bake for 25-30 minutes, or until lightly browned.

Enjoy!

Recipe from The Pastry Affair  –  Photo credit 

Minty Raspberry-Lime Mojitos (Non- Alcoholic)

...

Here’s another one of my favorite drink recipes! Obviously i’m making my mojitos Non-Alcoholic, but here is the description for those of you who don’t know what a basic mojito is/consists of…
The Mojito originated in the Caribbean, probably in Cuba. And it is more or less a rum smash with the addition of club soda, tangy fruit and mint which makes for a long delightful, thirst-quenching drink.   Perfect for celebrating with right around this time of year, so Enjoy!  🙂

Ingredients:

  • 3-4 fresh Raspberries, plus more for garnish
  • 5-6 Mint leaves
  • 2 tbsp. Simple Syrup (see directions below for how to make a simple syrup)
  • Ice
  • 1/4 cup Cranberry-Raspberry juice (or just raspberry juice if you can find it)
  • 2 tbsp. fresh Lime Juice (approx. 1/2 medium-large lime)
  • 1/2 cup Club Soda, Seltzer or Sparkling Mineral Water (i most love using a Raspberry-Lime Seltzer)

Directions for the Simple Syrup: To make a simple syrup, combine 1 cup granulated sugar with 1 cup water (or just equal parts, if making more or less) in a medium sauce pan. Heat over medium-low heat, stirring frequently, until it begins to boil and sugar is completely dissolved. Allow to cool.

Directions for the Mojitos: In a tall glass, add raspberries, mint leaves and the simple syrup. Muddle (squish with the back of a wooden spoon) well until the mint, simple syrup and raspberries are well-combined.  If possible, try not to break apart the mint leaves, as this (in my opinion) will make for a less pleasant drinking experience.  Fill glass with ice.  Add cranberry-raspberry juice, then lime juice and then fill with soda/seltzer.

Garnish with lime wedge or additional raspberries, if desired.

Enjoy!

Recipe adapted from: a sweet pea chef

Green Smoothie

...Hi Everybody! Sorry for the lack of post lately…been having a bad time of it with my internet access 😦 hopefully things will be back to normal soon, but until then – enjoy this smoothie recipe! 🙂

Refreshing and totally yummy – all while being healthy for you! Just don’t freak out at the strange green color…you’ll get used to it! lol

Ingredients:

  • 1 whole Kiwi, Peeled And Sliced
  • 1 whole Ripe Mango, Chopped And Frozen
  • 1-½ cup Lifeway Coconut Chia Kefir (or Almond Milk Or Greek Yogurt)
  • ½ whole Frozen Banana, Sliced
  • 1-½ cup Fresh Spinach

Directions:

Blend all ingredients in a blender (i use a Magic Bullet) until smooth and then serve immediately.

Optional extras to add: Chia seeds, Coconut, or Protein Powder.

Bon Appètit!

TeaTime Raspberry Thumbprint Cookies

Hi Everybody,

A few evenings ago it was raining and stormy outside, making it a rather dreary evening inside as well, so i decided to try making these lovely little cookies to cheer me up and to my delight, they came out splendidly! I hope you all enjoy this recipe! 🙂

Ingredients:

  • 1-½ cup Butter, Room Temperature
  • 1 cup Sugar
  • 1  Egg
  • 1 teaspoon Vanilla
  • ½ teaspoons Salt
  • 3-¼ cups Flour
  • ¾ cups Jam (any Kind)

Preparation Instructions:

Preheat the oven to 350ºF.

Cream the butter and sugar together until light and fluffy, about 3 minutes. Add the egg, then vanilla and salt, mixing well. With the mixer on low speed, slowly add the flour and mix until it just comes together.

Roll the dough into small balls(which may be a little difficult) then place on a lined baking sheet a few inches apart (cookies will spread). If the dough is hard to work with, refrigerate it for 30 minutes.

Using the back of a utensil, or your thumb, create a hollow in each cookie for the jam. Fill with jam. (but don’t over-do it! this is a less-is-more type of thing)

Bake for 18 to 20 minutes; the edges will be set, but the cookies should not be browned at all, and will not look done. Let the cookies cool for 1 minute on the sheet before moving them to a cooling rack.

If desired, fill with more jam and enjoy your cookies with a nice glass of milk or sweet cup of tea.

Bon Appètit!

Orange Julius

A perfect summertime treat that is super cool and refreshing! 🙂  Enjoy!
Serves: 1 large serving or 2 small servings
Ingredients:
1/2 cup orange juice
1/2 cup skim milk
1/2 cup cold water
1/8 cup sugar
1 1/2 tsp. vanilla
3 ice cubes
Directions:
In a blender add ice, orange juice, milk, water, sugar & vanilla. Blend on the chop ice setting for the first 15 or so seconds and then switch to the mix setting & pulse until well blended. Pour into a tall glass, let the foam rise to the top & enjoy the refreshment!

Recipe Credit : Sweet Savory Life & Associated Content

Cinnamon Crumb Coffeecake/Muffins

cinnamon cupcake

I’ve been on a bit of a muffin making marathon lately…So far I’ve made some chocolate muffins, cinnamon muffins and a kind of crumb muffin (i didn’t like that recipe as much though, so i used this one instead!) Hope you enjoy! 🙂

Crumbs for top and bottom:

  • 1 cup flour
  • 3/4 cup packed light brown sugar
  • 2 teaspoons ground cinnamon
  • 1/4 teaspoon salt
  • 1 stick unsalted butter, cold  and cut into 1/2 inch pieces

In a large bowl, stir together all ingredients for the crumb mixture and then work it with your fingers until it is thoroughly combined and forms large moist crumbs.  Cover and place in refrigerator while you prepare the cake batter.

For the cake batter:

  • 1 stick unsalted butter, softened to room temperature
  • 1 cup sugar
  • 1 teaspoon vanilla
  • 2 eggs
  • 1 & 1/2 cups cake flour
  • 1 1/2 teaspoons baking power
  • 1/4 teaspoon salt
  • 1/2 cup whole milk

Line a 12 cup muffin tin with with paper liners.

Preheat oven to 350 degrees.

With an electric mixer, cream butter and sugar until light and fluffy.  Add the sugar and continue to beat then gradually add the eggs one at a time.  Sift together the flour, baking powder and salt.  Add the dry ingredients to the butter mixture in 3 batches, alternating with the milk, and ending with the dry ingredients.

To fill the muffin tins: Spoon one heaping tablespoon of the crumb mixture into the bottom of each paper liner.  Then add enough cake batter to come almost to the top edge of the liner.  Then cover the batter with the remaining crumbs.

Bake until the tops feel firm to the touch and the edges are just beginning to turn golden brown, about 20 minutes.  Cool 10 minutes then remove from pan.  Serve or may be kept covered at room temperature for 2-3 days.

cinnamon cupcake/muffins

Photo & recipe credit 

The Pioneer Woman~Cinnamon Pull-Apart Bread

Hi Everybody!  My family loves making this sweet bread for brunch or serving it with coffee or tea whenever we have company come over.  It really is a special treat!  I recommend visiting Ree Drummonds original Post of this recipe because she did an amazing tutorial to go with it!  Click> HERE <to go to the original recipe post.  Hope you all enjoy! 🙂

Ingredients: For the Dough

  • 2 cups Whole Milk
  • 1/2 cup Canola Oil
  • 1/2 cup Sugar
  • 2-1/4 teaspoons Active Dry Yeast
  • 4 cups All-purpose Flour
  • 1/2 cup (additional) All-purpose Flour
  • 1/2 teaspoon Baking Powder
  • 1/2 teaspoon Baking Soda
  • 2 teaspoons Salt
  • 1 stick Butter, Melted
  • 1-1/2 cup Sugar
  • 3 Tablespoons Ground Cinnamon

Icing:

  • 3 cups Powdered Sugar
  • 2 Tablespoons Butter, Melted
  • 1 Tablespoon Maple Extract
  • 1/3 cup Whole Milk
  • Dash Of Salt

Directions:

  • To make the dough, combine milk, canola oil, and 1/2 cup sugar in a large saucepan. Heat it until very hot but not boiling. Turn off heat and allow to cool to warm (not at all hot.)
  • Sprinkle in the yeast and add 4 cups of flour. Stir to combine, then put lid on the pot and allow to rise for 1 hour. After 1 hour, stir in additional 1/2 cup flour, along with the baking powder, baking soda, and salt. If dough is overly sticky, stir in another 1/2 cup flour.
  • Place dough in the fridge for at least 1 hour to make it easier to work with.
  • Roll out dough onto a floured surface. Drizzle on melted butter and smear so that it covers all the dough. Mix together the sugar with the cinnamon and sprinkle it all over the surface of the dough. (Dough should look very covered.)
  • Cut the dough into 6 to 8 strips, then stack all the strips into one stack. Cut the stack of strips into 6 slices. Place the stacks sideways into a buttered bread pan. Do not cram the slices into the pan. (You may have a few leftover.)
  • Cover with a dish towel and allow to rise for 20 minutes. Preheat oven to 350 degrees. Place the pan in the oven and bake for 30 minutes, checking at 20 minutes to make sure it’s not getting too brown on top. It’s important to bake the bread long enough to ensure that the middle won’t be too doughy, because if it is it won’t pull apart easily. If the top looks like it’s getting too brown, cover it lightly with aluminum foil for the rest of the baking time. REPEAT: IT’S IMPORTANT TO BAKE THE BREAD LONG ENOUGH FOR THE CENTER TO NO LONGER BE DOUGHY.
  • Remove the pan from the oven when it’s done. Run a knife along the edges and take the bread out of the pan. Mix together the icing ingredients and drizzle over the top, allowing it to sink into the crevices. Serve warm or room temperature!

(Note: You can do a cranberry-orange version with orange marmalade, brown sugar, and dried cranberries!Or you can also add cloves and more cinnamon if you prefer a stronger flavor with raisins! When we make this we also enjoy spreading a cream cheese frosting on top.)

Bon Appètit!

Photo & Recipe credit The Pioneer Woman.com

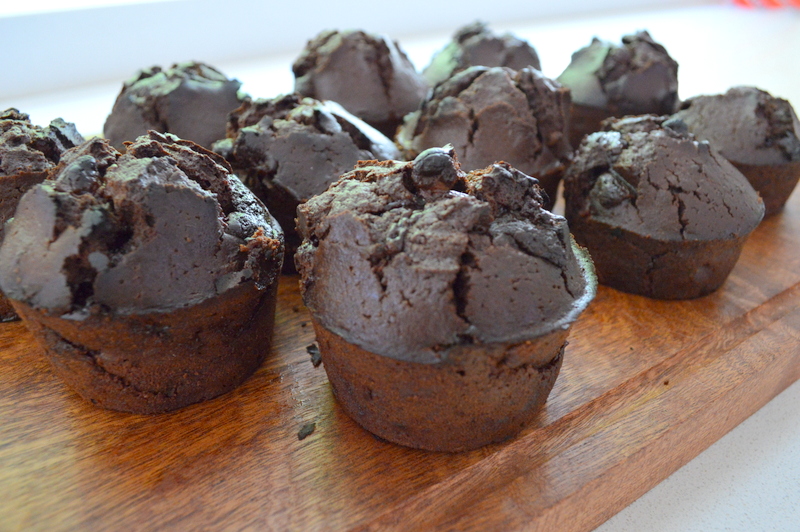
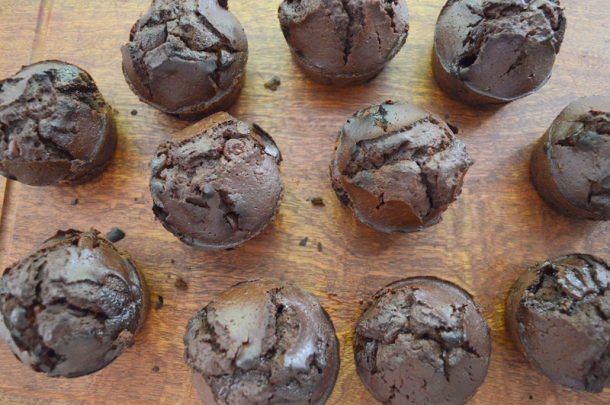
The Perfect Chocolate Chip Muffin

These muffins are delightfully scrumptious…perfect for a chocolaty treat without much guilt! 😉
Bon Appetit!

Edibles and Travels

Now I know that I usually try and find and make recipes that are just a little bit different, recipes that have a certain je ne sais quoin (lovely French followers – right spelling? Hope so!)

However, no good food blog is complete without a chocolate muffin recipe. Over the past few years, before I even had this blog, chocolate muffins were my favourite things to make. They were yummy and easy – the perfect combination for a foodie-in-training!

DSC_0481

DSC_0477

Yet, they were never special. They were never just right. They were often too spongy, too dry or too doughy. I could never find the right recipe to make the perfect chocolate chip muffin. Until today.

My friends, prepare to be amazed at this absolutely scrumptious recipe I found on this lovely blog – Kirbie Cravings. However, the recipe on this site wasn’t complete in my eyes (or more appropriately, my…

View original post 459 more words

Yorkshire Teacakes

https://sweetsixteenscountrykitchen.files.wordpress.com/2013/03/teacakes01framed.jpg

 Happy Easter Everybody! 
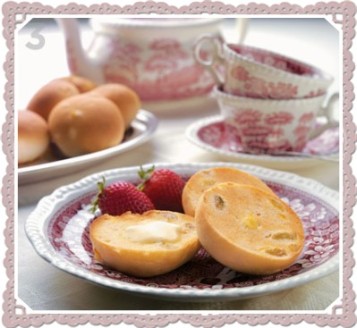
Yorkshire Teacakes are on the list of my “favorite things” so i thought I’d let you in on the recipe, so you can enjoy them too!  These fruit-filled tea-time treats are thought to be a refinement of the original medieval Manchét or “handbread” – a hand-shaped loaf made without a pan.  Serve them split & buttered, either warm from the oven or toasted.

Ingredients:

  • 1 & 1/4  cups Milk (plus extra for glazing)
  • 4 cups Flour
  • 1 teaspoon Salt
  • 3 tablespoons Sugar
  • 3 tablespoons Butter
  • 1 teaspoon rapid-rise Yeast
  • 1/4 cup Currants
  • 1/3 cup Raisins

Directions:

  1. Pour the milk into the bread machine pan. If the instructions for your machine specify that the yeast is to be placed in the pan first, then simply reverse the order in which you add the liquid and dry ingredients.
  2. Sprinkle the flour over, ensuring that it covers the milk completely. Add the salt, sugar and butter, placing them in separate corners of the bread machine pan. Make a shallow indention in the center of the flour (but do not go down as far as the liquid) and add the yeast.
  3. Set the bread Machine to the dough setting; use basic raisin dough setting (if available). Press Start. Add the currents and golden raisins when the machine beeps. If your machine does not have this facility, simply add the dried fruits 5 minutes before the end of the kneading period ends.
  4. Lightly grease two baking sheets. When the dough cycle has finished, remove the dough from the machine & place it on a lightly floured surface. Punch it down gently.
  5. Divide the dough into eight or ten portions, (depending on how large you like your Yorkshire Teacakes) and shape into balls. Flatten out each ball into a disk about 1/2 inch thick.
  6. Place the disks on the prepared baking sheets, about 1 inch apart. Cover them with oiled plastic wrap & set aside in a warm place for 30-45 minutes, or until they are almost doubled in size. Meanwhile, preheat your oven to 400 degrees(F)
  7. Bush the tops of each teacake with milk, then bake for 15-18 minutes, or until golden. Place onto a wire rack to cool slightly.
  8. To serve, split open while still warm & spread with butter, or let the teacakes cool, then split and toast them before adding butter. 

Cooks Tip: If you forget to add the fruit when making the dough, don’t worry. Just knead it in when you punch down the dough before shaping it.

Happy Baking & Bon Appétit!

Recipe from the book: Bread Machine: How to prepare and bake the perfect loaf by Jennie Shapter

Banana Bread/Cake

This is a tasty, cake-like, bread recipe. A wonderful way to use up bananas that have gone-by, actually old bananas are the best for this recipe. Enjoy!

“When I started counting my blessings, my whole life turned around.” ~Willie Nelson

“Gratitude unlocks the fullness of life. It turns what we have into enough, and more. It turns denial into acceptance, chaos into order, confusion into clarity…Gratitude makes sense of our past, brings peace for today and creates a vision for tomorrow.”~Melodie Beattie

Rye bread with banana and honey  Stock Photo - 8946235

Banana Bread/Cake

-Preheat oven 350 degrees

-Grease and flour pan

  • 2/3 cup shortening
  • 2 1/2 cups flour
  • 1 2/3 cup sugar
  • 1 1/4 tsp. Baking Powder
  • 1 tsp. salt
  • 1 tsp. Baking Soda
  • 1 1/4 cups Bananas mashed (3 bananas)
  • 2/3 cup Buttermilk (add 1 scant Tablespoon vinegar to 2/3 cup regular milk if you don have buttermilk)
  • 2 Eggs
  • 1 tsp. Vanilla

-Mix wet and dry ingredients separately then mix together add mashed bananas last

-Makes 2 loaves

Other ideas…

-Bake Muffins- 20 minutes

-9×13 cake- 30 minutes (can be frosted and served as cake)

– Bread 30-35 minutes

– Bunt pan 45 minutes this is a good way to do it, it still cuts like bread but you only have 1 pan to wash!) 🙂

*picture from: http://www.123rf.com/photo_8946235_rye-bread-with-banana-and-honey.html

Strawberry Oatmeal Bars ~ A Pioneer Woman Recipe

Strawberry Oatmeal Bars

Photo Copyright – The Pioneer Woman

Hey Guys!  I’m so excited to share with you my newest found favorite treat!  Strawberry Oatmeal Bars are perfectly divine, (i’m totally in love=addicted to them) – and i hope you will be too!  😉

Ingredients:

  • 1-3/4 stick Cold Butter, Cut Into Pieces
  • 1-1/2 cup All-purpose Flour
  • 1-1/2 cup Oats (quick Or Regular)
  • 1 cup Packed Brown Sugar
  • 1 teaspoon Baking Powder
  • 1/4 teaspoon Salt
  • 1 jar (10 To 12 Ounce) Strawberry (or any) Preserves (whip them with a spoon first to make them easier to spread!)

Preparation Instructions:

Preheat the oven to 350 degrees. Butter a 9 x 13 or 8 x 10 baking dish.

Mix together the flour, oats, brown sugar, baking powder, and salt. Cut in the butter with a pastry cutter until it resembles coarse crumbs. Sprinkle half the mixture into the pan and pat lightly to pack it a little tight. Spoon strawberry preserves evenly over the surface, then use a dinner knife to carefully spread it around. Sprinkle the other half of the oat mixture over the top and pat lightly again. Bake until light golden brown on top, about 30 to 40 minutes. Remove from the oven and let cool in pan. When cool, cut into squares and serve.

Bon Appètit!

Photo/Recipe Credit – The Pioneer Woman.com