Pumpkin Pie Custard

Here’s a special pumpkin custard recipe that i’m making for the holiday! Hope you all enjoy! 🙂

Prep Time 10 Minutes
Cook Time 1 Hour
Servings 3    Difficulty Easy

Ingredients:

  • 3 Tablespoons Pure Maple Syrup
  • 1 whole Egg
  • 1-½ whole Egg Whites
  • 2-½ Tablespoons Granulated Sugar
  • ½ cups Pureed Canned Pumpkin
  • 1 teaspoon Vanilla Extract
  • ⅛ teaspoons Salt
  • 1 teaspoon Ground Cinnamon
  • Âź teaspoons Ground Nutmeg
  • Âź teaspoons Ground Ginger
  • ½ cups Skim Milk

Directions: Preheat oven to 325ÂşF. Pour 1 tablespoon of maple syrup into each ramekin, swirl to cover the bottom. Whisk together egg, egg whites, and sugar. Add pumpkin, vanilla, salt and spices. Gently whisk in milk. Pour equally into ramekins. Place ramekins into a baking dish and fill with boiling hot water until 1/4 of the side of the ramekins is covered. Bake for 60-70 minutes. They are done when the middle of the custard is set and does not wiggle when lightly tapped. Let cool completely, cover and store in the refrigerator.

These are delicious little treats, perfect for serving cold or heated slightly in the microwave!

Bon Appètit!

Photo & Recipe Credit

Cinnamon Bun Smoothie

Cinnamon Bun Smoothie RecipeI make this Smoothie all the time! It’s a super easy morning treat for those of us that aren’t really big breakfast eaters or else don’t have much time in the mornings to prepare a grand feast! lol ~  The banana and almond milk make this smoothie have a very light & creamy texture that is just as delicious (and evil!) as that smoothie you love from the cafe – Just minus all those extra calories!  (So of course you love me now, right!?) lol 😉

Ingredients:

1 frozen banana, cut into pieces
1 cup unsweetened almond milk

1/2 teaspoon ground cinnamon
1/4 teaspoon vanilla extract
1/2 teaspoon pure maple syrup
Cinnamon stick, for garnish

Directions:

  1. Combine all ingredients in a blender. Blend until smooth, and add more almond milk if necessary.
  2. Pour into a tall glass, add the cinnamon stick for garnish and attractiveness 😉 & drink up!

Bon Appètit!

Makes one serving

https://i0.wp.com/media1.onsugar.com/files/2013/03/10/1/192/1922729/9fed84dee8a20c89_nutritional-info.xxxlarge.jpg

Baked Fall Apples

h..

Here’s a yummy little fall treat for you to try! Perfect by themselves as a breakfast dish, try serving these at your next brunch!  You can also serve with vanilla ice cream for dessert. 😉

Ingredients:

  • 6 baking Apples (such as Cortland, Empire, Gala, Braeburn, or Pippin)
  • 1 & 1/2 cup Oats
  • 1/2 tsp, Cinnamon
  • 1/2 tsp. Nutmeg
  • 1/2 cup chopped candied or plain Nuts (i used walnuts & almonds)
  • 1/3 cup light or dark brown Sugar
  • 1/2 cup dried Cranberry’s, cherry’s, or blueberry’s
  • 2 tablespoons Butter, cut into small pieces
  1. Heat oven to 400° F. Remove and discard the cores from the apples. Place the apples in a 9- by-13-inch baking dish.
  2. In a small bowl, combine the oats, spices, nuts, dried fruit, sugar and butter. Divide the mixture among the apples. (You can cover and refrigerate for up to 24 hours.) Bake covered until tender, about 25 minutes.

Tip from the test kitchen:  I’ve made these Apples using other settings as well and i really like how they turned out!*

*All I did was set my oven to 350° F  and then baked the apples, covered, for around 50 minuets instead. My thinking here is that it gives the apples more time to slowly release that juiciness and flavor into the mixture, and I’ve found that the apples i’ve made this way are extra soft and tender.

            ♥Leave me a comment below to let me know which way you decided to try these & how you liked it! ♥

Happy Baking & Bon Appètit!

Blueberry Buckle

Hey everybody!  Sorry for the crazy posting schedule this summer & i know this post is a little late! Life has been pretty insane so I’m afraid my blogging has suffered a bit! – During this time away though, I did have a chance to go blueberry picking, and once i got home i was super excited to try this recipe that my friend gave me! It turned out pretty amazing; so i hope you all like it as much as i do! 🙂

Ingredients:

  • 1Tsp. Vanilla
  • 3/4 cup Sugar (i mixed half brown sugar with the regular)
  • 1 Egg
  • 1/2 cup Butter (room temp.)
  • 2 cups Flour
  • 2 Tsp. Baking Powder
  • 1/4 tsp. Salt
  • 1/2 cup Milk (use part buttermilk or cream if you have it!)
  • 1/2 cup Sour Cream
  • 2 Cups Blueberry’s (you can also use strawberry’s , raspberry’s etc…)

Crumb Topping:

  • 1/3 cup Flour
  • 1/2 cup Brown Sugar
  • 1/2 stick melted Butter

Directions: Cream together the vanilla, sugar, egg, and butter in a big bowl until smooth. Add the dry ingredients, then finally pour in the sour cream and milk. Now before you go adding the berries in, your going to want to toss them with just enough flour to lightly coat them. This will help to prevent them from sinking to the bottom of the pan. Next pour into your pan, this is the part where you’ll add the topping crumb mix, and then slip it into a pre-heated oven. The  approx. bake time for this recipe is 45-60 minuets. So just keep an eye on the oven once it has been in for 45 mins, then poke a knife into the pan and see if it comes out clean – when i does, the blueberry buckle is ready for you to take out and enjoy!  🙂

Tip: the Crumb Topping recipe is just what i used this time, but you could defiantly change it up however if you have a better idea then mine! lol  – Please leave me a comment below if you do! 🙂

...Happy Baking & Bon Appètit!

Mango Pina Colada Smoothie

.jpg~Afternoon Everybody~  My mother and i decided to change things up a bit this morning & make a smoothie more on the tropical side of things! It is so fresh tasting and decadently delicious! I hope you all enjoy! 🙂
Ingredients:

  • 1 Mango, peeled, sliced & cubed
  • 1 1/4 cup Ice Cubes
  • 2 teaspoons Sugar (or agave nectar)
  • 1 1/4 cup Pineapple Juice
  • 1/2 cup heavy Cream
  • 1 (14 ounce) can Coconut Milk

Directions: Place the mango cubes, ice, sugar, pineapple juice, cream, and coconut milk into a blender. Puree until smooth, pour into glasses and serve.

“Deathly Dark” Chocolate Pudding

... Good Morning Everybody!

I was in a very creative mood about two weeks ago (sorry it’s taken me so long to blog about it! lol)….but anyways! – I wanted to try making something super easy, so i went looking for a recipe that fit my mood…i guess that was pudding!? (random huh? lol) Anyways! I compared around 8 different recipes and finally decided to take an element from each recipe and combined/mix ingredients till i got the right constancy and taste. So i’ve made this pudding literally like 5 times with-in the past  2 weeks! 😉 …..every time i make a new batch i find out the next morning that it’s all gone! The kids just devourer it! So here is the resulting recipe of my crazy experiment! Hope ya’ll like it!

Ingredients:

  • 2 cups Milk
  • 3/4 cup Sugar
  • 1/3 cup Hershey’s Cocoa Powder
  • Pinch of Salt
  • 2-3 Tbs. Cornstarch (the amount sometimes varies depending on the day idk why! lol)
  • 1 teaspoon Vanilla

Directions: In a medium size sauce pan, whisk in the Sugar, Cocoa Powder, Salt, & 1 cup Milk; Heat over a medium flame & stir mixture often so as not to burn it. Once the temperature is just under boiling, sift in the cornstarch and then add the other 1 cup of milk then the Vanilla. Stir to get rid of any lumps. Let the mixture almost reach boiling point – this is when it really starts to thicken, so make sure you stir it consistently. Once the mixture reaches your preferred thickness, pour into a glass dish and place into the fridge to cool. (unless you like to serve it right away! 😉 ) Then just serve when your ready!

(Hint #1: Vanilla Ice Cream is awesome scooped on top for when served warm…but you didn’t hear me say that! lol)

(Hint #2: For an extra chocolate kick i like melting about 1/2 cup of chocolate chips into the mixture by pouring them in after the cornstarch has been fully dissolved!)

~ I’m sure you’ll all hate me now because you want to make this 😉 … so i’m going to sign off now (Mawhahahahaha! lol) ~

Bon AppĂŠtit!

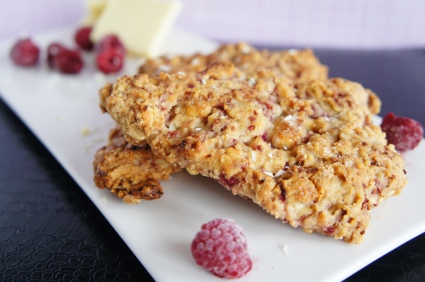
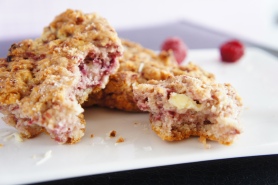
White Chocolate Raspberry Scones

Raspberry White Chocolate Scones

Serve these scones warm with a good cup of coffee (or tea!) for a delightful morning or early afternoon treat!  Bon Appètit!  :D

Ingredients:

Makes about 8 triangular pieces

  • 2 cups all-purpose Flour
  • 2 tablespoons white granulated Sugar, plus extra for sprinkling
  • 1 tablespoon Baking Powder
  • 1/2 teaspoon Salt
  • 6 tablespoons Butter, cut into small pieces
  • 3/4 cup Raspberries (fresh or frozen – I used frozen)
  • 1/2 cup White Chocolate chips
  • 1 large Egg
  • 1 teaspoon Vanilla extract
  • 1/3 cup Heavy Cream...

Directions:  Preheat oven to 350 degrees.
– In a large mixing bowl, whisk together flour, sugar, baking powder, and salt.
– Add in the butter and mix with your hands until mixture resembles coarse sand.
– Gently fold in raspberries and white chocolate chips. Set aside.

– In a small bowl, beat together egg, vanilla, and heavy cream.
– Pour over the scone batter and lightly mix until the dough comes together. The dough will be sticky.

– Turn out dough on a lightly floured surface, form a circle, and flatten it until it is about 1-inch thick.
– Using a sharp knife dipped in flour, cut 8 equal pie wedges (the dough will be slightly unmanageable, but not adding additional flour results in tender scones).
– Transfer scones to a baking sheet using a flat spatula dipped in flour and sprinkle the tops of the scones with a little granulated sugar.
– Bake for 25-30 minutes, or until lightly browned.

Enjoy!

Recipe from The Pastry Affair  –  Photo credit 

Minty Raspberry-Lime Mojitos (Non- Alcoholic)

...

Here’s another one of my favorite drink recipes! Obviously i’m making my mojitos Non-Alcoholic, but here is the description for those of you who don’t know what a basic mojito is/consists of…
The Mojito originated in the Caribbean, probably in Cuba. And it is more or less a rum smash with the addition of club soda, tangy fruit and mint which makes for a long delightful, thirst-quenching drink.   Perfect for celebrating with right around this time of year, so Enjoy!  🙂

Ingredients:

  • 3-4 fresh Raspberries, plus more for garnish
  • 5-6 Mint leaves
  • 2 tbsp. Simple Syrup (see directions below for how to make a simple syrup)
  • Ice
  • 1/4 cup Cranberry-Raspberry juice (or just raspberry juice if you can find it)
  • 2 tbsp. fresh Lime Juice (approx. 1/2 medium-large lime)
  • 1/2 cup Club Soda, Seltzer or Sparkling Mineral Water (i most love using a Raspberry-Lime Seltzer)

Directions for the Simple Syrup: To make a simple syrup, combine 1 cup granulated sugar with 1 cup water (or just equal parts, if making more or less) in a medium sauce pan. Heat over medium-low heat, stirring frequently, until it begins to boil and sugar is completely dissolved. Allow to cool.

Directions for the Mojitos: In a tall glass, add raspberries, mint leaves and the simple syrup. Muddle (squish with the back of a wooden spoon) well until the mint, simple syrup and raspberries are well-combined.  If possible, try not to break apart the mint leaves, as this (in my opinion) will make for a less pleasant drinking experience.  Fill glass with ice.  Add cranberry-raspberry juice, then lime juice and then fill with soda/seltzer.

Garnish with lime wedge or additional raspberries, if desired.

Enjoy!

Recipe adapted from: a sweet pea chef

Sangria’s (Non-Alcoholic) & a day at the lake

...

Hey everybody! I know it’s been a while since i last posted 😥 …sorry ’bout that!  But while i’ve been gone, (from the blogging world anyway) i’ve been trying to drink in as much sun as possible (so that maybe i can finally get that tan!?) and so that led to my spending this past Monday up a my friends lake-house. We had a few doubts about the weather on our way up to the lake (as it was badly storming and we had to drive 30mph under the speed limit just to make it safely there!) But while i was up at the lake i had a great time looking through some cook-books, and picking some super great recipes to try! We made some guacamole (i’ll post the recipe soon!) and then the weather was finally nice enough for us to go out in the kayaks for an hour. It was a blast and i’ve got a  lot of recipes coming your way soon!

Ok so about this recipe : I’ve been on the hunt for some fun (Non-Alcoholic) cocktails or um (Mocktails i guess) recipes for some party’s i’m planing & this sangria recipe is a great fit to what i’ve been looking for! 😉  Hope ya’ll Enjoy it!

Ingredients:
Serves 8

  • 2 cups boiling water
  • 2 black tea bags (or 2 teaspoons loose-leaf tea in an infuser)
  • 2 cinnamon sticks
  • 1/2 cup sugar
  • 3 cups pomegranate juice
  • 1 cup freshly squeezed orange juice
  • 1 orange, sliced into thin rounds
  • 1 lemon, sliced into thin rounds
  • 1 lime, sliced into thin rounds
  • 1 apple, cored and cut into 1/2-inch chunks
  • 3 cups carbonated water (like seltzer)

Directions: Pour boiling water over tea bags and cinnamon sticks and steep for 5 minutes. Discard tea bags and stir in sugar to dissolve.

In a large jar or pitcher, combine tea, cinnamon sticks, pomegranate juice, orange juice, orange, lemon, lime, and apple. Refrigerate for at least 1 hour and preferably overnight.

Just before serving, stir in carbonated water. Serve in pretty glasses over ice.

2012_04_27-sangria3.jpg  P.S: Please leave me a comment below if you have any other recipe ideas for me to try – I’d love to hear from my readers! 🙂
Recipe & Photo Credit:

Magic Cookie Bars

....

Greetings everybody! So sorry for the lack of posts lately…holidays, birthdays, weddings and graduations all come flooding in around this time of year, & thing have gotten kinda’ crazy because of that! 😉

This recipe is great because it’s not too time consuming, and for the most part, you *should* already have everything you need for them in your cupboard! Perfect for bringing to that summer event you are invited to at just the last minuet!  Hope you Enjoy!  🙂

Ingredients:

  • 1 & 1/2 cups graham cracker crumbs
  • 1/2 cup margarine (melted)
  • 1 cup chopped walnuts
  • 3/4 cup semisweet chocolate chips
  • 3/4 cup butterscotch chips
  • 1 & 1/2 cups flaked coconut
  • 1 & 1/3 cups sweetened condensed milk

Directions:

  1. Preheat oven to 350 degrees F (175 degrees C).
  2. In a 9 x 13 inch pan pour in melted margarine. Sprinkle the graham cracker crumbs evenly over the margarine. Next place the chopped nuts over the crumbs, and spread the chocolate and butterscotch chips over the nuts. Add the coconut over all, and pour the milk evenly over the top.
  3. Bake 25 to 30 minutes or until lightly brown on top. Cool at least 20 minutes then cut into desired sized bars.

Bon AppĂŠtit!

Recipe & Photo Credit

Green Smoothie

...Hi Everybody! Sorry for the lack of post lately…been having a bad time of it with my internet access 😦 hopefully things will be back to normal soon, but until then – enjoy this smoothie recipe! 🙂

Refreshing and totally yummy – all while being healthy for you! Just don’t freak out at the strange green color…you’ll get used to it! lol

Ingredients:

  • 1 whole Kiwi, Peeled And Sliced
  • 1 whole Ripe Mango, Chopped And Frozen
  • 1-½ cup Lifeway Coconut Chia Kefir (or Almond Milk Or Greek Yogurt)
  • ½ whole Frozen Banana, Sliced
  • 1-½ cup Fresh Spinach

Directions:

Blend all ingredients in a blender (i use a Magic Bullet) until smooth and then serve immediately.

Optional extras to add: Chia seeds, Coconut, or Protein Powder.

Bon Appètit!

TeaTime Raspberry Thumbprint Cookies

Hi Everybody,

A few evenings ago it was raining and stormy outside, making it a rather dreary evening inside as well, so i decided to try making these lovely little cookies to cheer me up and to my delight, they came out splendidly! I hope you all enjoy this recipe! 🙂

Ingredients:

  • 1-½ cup Butter, Room Temperature
  • 1 cup Sugar
  • 1  Egg
  • 1 teaspoon Vanilla
  • ½ teaspoons Salt
  • 3-Âź cups Flour
  • ž cups Jam (any Kind)

Preparation Instructions:

Preheat the oven to 350ÂşF.

Cream the butter and sugar together until light and fluffy, about 3 minutes. Add the egg, then vanilla and salt, mixing well. With the mixer on low speed, slowly add the flour and mix until it just comes together.

Roll the dough into small balls(which may be a little difficult) then place on a lined baking sheet a few inches apart (cookies will spread). If the dough is hard to work with, refrigerate it for 30 minutes.

Using the back of a utensil, or your thumb, create a hollow in each cookie for the jam. Fill with jam. (but don’t over-do it! this is a less-is-more type of thing)

Bake for 18 to 20 minutes; the edges will be set, but the cookies should not be browned at all, and will not look done. Let the cookies cool for 1 minute on the sheet before moving them to a cooling rack.

If desired, fill with more jam and enjoy your cookies with a nice glass of milk or sweet cup of tea.

Bon Appètit!

Little Debbie Zebra Cakes

Good morning everybody! I hope you all had a lovely Memorial day week-end! It wasn’t exactly perfect summer weather in my neck of the woods, but it was still a lovely time (with lots of good food!) 🙂
As for this recipe, I’ve been meaning to share it with you for a few weeks now, but i haven’t been able to get around to posting it before now- so my apologies!  We’ve been making these little cakes so many times with-in the past month that we could probably win an award by now! lol 😉 They are the perfect desert when bringing something to parties, picnics, church dinners etc. and once you get the hang of making them they really are pretty easy! 🙂
 
Ingredients:
For the Yellow Cake:
3 cups cake flour
3 1/2 teaspoons baking powder
1/2 teaspoon salt
3/4 cup unsalted butter, room temperature
1 & 1/3 cups sugar
6 large egg yolks
1 cup whole milk
2 teaspoons pure vanilla extract

For the Filling:

  • 12 tablespoons unsalted butter, room temperature
  • 1/2 cup vegetable shortening
  • 1/4 cup milk
  • 1 teaspoon pure vanilla extract
  • 3 cups confectioners’ sugar

The White Chocolate Coating:  

  • 16 oz. white chocolate melting chips
  • 1/2 cup vegetable shortening

The Dark Chocolate Drizzle:

  • 4 oz. dark chocolate melting chips
  • 1/2 tsp. Oil
Directions:
To make the Yellow Cake:
  1. Preheat oven to 350 degrees F.
  2. In a medium bowl, sift the flour with the baking powder and salt.
  3. Using a stand mixer with a paddle attachment, beat the butter until soft and creamy, about 1-2 minutes.
  4. Slowly add the sugar and beat until light and fluffy, about 3-5 minutes.
  5. Add egg yolks, in two batches, beating well after each addition. Scrape down the sides of the bowl as needed.
  6. Add the vanilla extract and beat until combined.
  7. With the mixer on low speed, alternately add the flour mixture (in three additions), and milk (in two additions), beginning and ending with the flour.
  8. Pour batter into a greased 15×10-inch jelly roll pan.
  9. Bake at 350 degrees F for 15-20 minutes.
  10. Place the cake on a wire rack to cool, in their pans, for about 10 minutes. Then remove the cake from the pan and place onto a greased rack to cool completely.
  11. Use a biscuit cutter or other round cutter to cut an even number of circles in the cake. Try to cut the circles close together to maximize the number of cakes. close together in the cake.
* Yellow Cake recipe is adapted from the Joy of Baking.
Filling:
  1. While the cake is cooling, cream together butter and shortening until smooth.
  2. Slowly add the milk, sugar, and vanilla extract.
  3. Continue beating on medium speed until smooth and creamy.
  4. Place the flat side of one cake circle face down. Spread filling on the top.
  5. Top with another cake circle, flat side up. Repeat with all the cakes.
  6. Place the cakes on a baking sheet lined with wax paper and refrigerate for 30 minutes.
White Chocolate Coating:
  1. In a large microwave-safe bowl, melt the white chocolate chips and shortening, stopping to mix every 30 seconds.
  2. Once fully melted and combined, place a cake in the bowl and gently spoon the melted chocolate over the top.
  3. Slide a fork under the cake and lift it out, pausing to let the excess drip off.
  4. Place the cake back on waxed paper. Repeat with all the cakes, then let sit at room temperature until coating is set.
* White Chocolate Coating recipe is adapted from the Confessions of a Cookbook Queen blog.
Dark Chocolate Drizzle:
  1. When the coated cakes have set, melt the dark chocolate in a microwave-safe bowl, stopping to mix every 30 seconds.
  2. Drizzle over the top of the cakes.

Happy Baking & Bon Appètit!

Credit: Google Images

Orange Julius

A perfect summertime treat that is super cool and refreshing! 🙂  Enjoy!
Serves: 1 large serving or 2 small servings
Ingredients:
1/2 cup orange juice
1/2 cup skim milk
1/2 cup cold water
1/8 cup sugar
1 1/2 tsp. vanilla
3 ice cubes
Directions:
In a blender add ice, orange juice, milk, water, sugar & vanilla. Blend on the chop ice setting for the first 15 or so seconds and then switch to the mix setting & pulse until well blended. Pour into a tall glass, let the foam rise to the top & enjoy the refreshment!

Recipe Credit : Sweet Savory Life & Associated Content

Chewy Chocolate Caramel Bars

...

These gooey bars of chocolaty goodness are a lovely change to an ordinary brownie recipe. Make sure to follow the directions closely and you will end-up with a very special treat! :)“This is my invariable advice to people: Learn how to cook- try new recipes, learn from your mistakes, be fearless, and above all have fun!”
― Julia Child, My Life in France

Prep Time: 10 minutes

Cook Time: 25 minutes

Total Time: 1 hour, 30 minutes

Yield: one 13X9″ baking pan

 Ingredients:

  • 2 cups (240 grams) all-purpose flour
  • 1/4 cup (56 grams) diced cold butter
  • 1 1/2 cups (300 grams) sugar
  • 1 cup (80 grams) cocoa
  • 2 teaspoons baking powder
  • 1 teaspoon baking soda
  • 1/2 teaspoon salt
  • 3/4 cup (168 grams) melted butter
  • 5 oz (1 small) can evaporated milk
  • 14 oz caramels, unwrapped
  • 1 1/2 cups (226 grams) semi-sweet chocolate chips
  • 12-14 extra caramels

Directions:

  1. Heat the oven to 350F.
  2. Line a 13X9 baking pan with parchment paper. Set aside.
  3. In a food processor add the flour and cold diced butter. Pulse a few more times until the mixture resembles fine breadcrumbs and all the butter is cut in. You can also use a pastry blender, a fork or rub the butter and flour with your hands.
  4. Add the sugar, cocoa, baking powder, baking soda, salt and whisk to combine.
  5. In a large mixing bowl add the dry ingredients mix and pout the melted butter on top. Add 1/3 cup of the evaporated milk and mix until well combined. The dough it’s going to be similar to a light crumby cookie dough.
  6. Spread 2/3 of the dough in the prepared baking pan and set aside. Refrigerate the remaining dough until needed.
  7. In a small saucepan place the remaining evaporated milk and the unwrapped caramels. Stir continuously over low heat until the caramels are melted. Pout over the cookie dough base.
  8. Sprinkle the chocolate chips over the caramel layer.
  9. Take the remaining cookie dough out of the fridge and crumble it on top of the chocolate chips.
  10. Top with the remaining caramels.
  11. Bake for 25 minutes.
  12. It may seem bubbly and undone but once cooled the caramel and chocolate layers will set.
  13. Cool completely in the pan before cutting into bars.

Bon AppĂŠtit!

Recipe & Photo Credit